Monthly Archives: October 2013

Erin Hill’s travel sketch workshop

Today I travelled to Manly to give my third (or is it fourth) guest presentation at Erin Hill’s Sketch Class. (Scroll down to the bottom of her page for today’s class photos and sketches). I had the privilege of sharing my enthusiasm and excitement about sketchbook travel journaling. I talked about how and when I sketch and why. I hope that is provided a little insight into the world of travel sketching.
 
 
I sketched my day from the start to finish , so that when I arrived at the class I already had sketched on the ferry. I left a space for the map, which I completed at home. I penciled in a heading, and completed at home, to match the colours I used on the page during the day.
 
leaving Circular Quay on the Manly Ferry. A classic view of the Opera House and Sydney  Harbour Bridge


Arriving at Manly Wharf and sketched at the wharf
 
After my short chat we did our own travelling from Erin’s Studio at Manly to Shelly Beach. It is a 15 minute beachside walk . Just perfect on a sunny day. We stopped twice along the way to sketch the scenery, sculptures on the way, plants and people. It was a chance to try and capture the essence of a moment or place on paper.
 
Sandstone cliffs on the Manly to Shelly Beach beachside walk
 
View to Shelly Beach as we got closer
 
Water dragons sunning by the side of the path
 
Our final destination was the Sand Bar café at Shelly Beach. We continued to sketch – I did my lunch of course. One of the newest sketchers had her priorities right – her lunch plate on her lap and sketchbook  on the table !
View from Shelly Beach and my lunch from the Sand Bar Cafe
 
It was all over to soon and time to say goodbye til next time.


and I sketched on the way home, finishing with the ferry ride home.
so many sail boats on the harbour

view of the sailboats from the ferry

Creation of a birds nest hat

I draw daily and have a few different styles, depending on where I am, how I feel  etc.

I am an Urban sketcher, I draw on envelopes, I am a nature sketcher, and draw objects .

They are ALWAYS in watercolour pencil, which I love to use, and sometimes use my Lamy Safari Ink Pen. I draw and sketch ALMOST ALWAYS in my watercolour Moleskine sketchbook 13 x 21 cm

I am going to share with you a project that I worked on last year. It is a hat that is a nest !
I created it – (not found in nature like this !!) 
I had put it away for a while, as I got distracted by other drawing projects. But now I have started drawing feathers again and have more nests to draw ( and another hat)

I spent a lot of time this drawing,  more than I have even spent on a piece of art . I was out of my comfort zone in terms of the size of the paper I was working on  (56 x 38cm). When working larger I also had to show more detail and came across a few other issues that perplexed me.

The finished (or is it?) drawing. It is too big to put on my scanner at home, so I have had to take a photograph

Below is how it evolved from an idea to where it is today (above)


In May 2010 I drew a hat that I owned for an Everyday Matters Challenge “Draw something old”. Years ago I was given an old hat box and inside it were two hats.

hat I was given

quail eggs from the markets


In 2012 I went to a local community art class and we were encouraged to draw a still life – thinking outside of the box. These are some quail eggs that bought from the local markets to draw.  I drew on a large on a large sheet of cartridge paper. It did not take the water very well, so I left it as watercolour pencil.  It is not very different from the final result

experiment on cartridge paper
 
 
I decided to take this on as a project. The hat/nest/eggs sat on my dining table for weeks on end over the course of the drawing


I did the first sketch in a large size on a spare sheet of paper .  


I bought a large sheet of paper Fabriano (56 x 38cm). (not sure what weight) and started on the hat

I had done quite a lot of work on the hat and realised that I had better figure out where the quail eggs were going to sit. They were hollowed out so were very light and I used blue tack to try and get them to stay in the same place. But a slight knock against the dining table sometimes had my careful arrangement collapsing


I had to experiment to try and allow for the light coloured hat netting to be seen against the dark fur. I used fluid masking fluid for the first time – varying degrees of success.  I experimented on a spare sheet of paper but the final version had varying areas of success.

You can’t add a lighter colour over a darker colour with watercolour pencils. I discovered that watersoluble crayons were successful for adding lighter highlights and lines. I could not add much contrast or detail, but they were useful


I then needed to add the branches where the nest/hat is sitting.
 
I photocopied the drawing in colour and did a lot of rubbing out and changing. Some branch placings just did not look right. There was a lot of experimentation again as the angle had to be just right so that it looked like it was actually sitting in the tree. This is something I should have thought of when I planned the page. It took a while and asking a lot of advice from friends. A good suggestion was to hold it up against a mirror to see if it looked ok.
where to place the branches
 

The next decision was to how to draw the branches – sketchy, detailed, coloured, graphite??

 I did some mock ups in each style and held them up against the hat/nest.

 My final decision was to a sketchy graphite, with a hint of watercolour . See the final drawing at the top of the page

So after many, many weeks it was time to put the nest and eggs back in the display cabinet, and put my drawing away for a while. But I have taken it out now and am a lot happier with it than I was at the time . I was too close to my work – like a university assignment that you have worked on for too long and makes complete sense to you ,but also no sense at all.

I will add a few tweaks and put it up on the wall. Then I can start on the next one- did  mention I got two hats in the hat box !


sketchbook travel journal : the practicalities

 
 Recently I reflected on my blog on the realities of sketching and drawing in a sketchbook while travelling, and on how and what/how I would draw. On my holiday in London and Barcelona, I could put my theories into practice and test them to see what happened in reality.
 
 I also had a chance to experience the realities of the act of sketching while travelling. I now have the opportunity to reflect on the practicalities of sketching . This is what I experienced and will be vastly different for everyone, but might give some insight.
 

                               PRACTICALITIES – MY PENCILS

I have a customised pencil wrap for my watercolour pencils. Read and see the story of its creation. This was my opportunity to test it out while travelling. I found that the design was great for all of my on the spot sketching, for example leaning up against a wall, at cafes or on the plane. I can have it out in front of me and see all colours at once.   I only lost three pencils in London. (Light Chrome Yellow had to be replaced twice – why was it jumping out??). But losing pencils (and erasers) proved an excellent excuse to visit two amazing art shops that I knew of. They are both traditional shops that are a joy to browse through – lots of wooden drawers with papers, paint pigment for grinding and other Cornelissen & Son Artists’ Colourmen in Bloomsbury and Green & Stone of Chelsea. Heaven


day before London- a lot dirtier and worn now

Sharpener pocket
 
I had asked for pockets for my eraser and my pencil sharpener.
  
Sharpener – worked brilliantly. I found that I did not take the sharpener out of the pocket, but put the pencil into the sharpener while it was in the pocket.  The pocket did fill up with pencil shavings, but it worked really well. I think we may make the next version using a sharpener with a container attached to it. I think Staedler make one

 
Eraser  – did not work. I broke my eraser into smaller pieces and would put one piece in the pocket. However, they fell out and I lost so many erasers throughout London in the first week. Very frustrating. But then, in Barcelona at the Urban Sketching Symposium, we were given lots of freebies by the sponsers. One was a mechanical eraser – It has solved all my problems. And I can put it one of the pencil slots in the wrap.


Tombow mechanical eraser
 
 
PRACTICALITIES – OPPORTUNITIES  TO SKETCH


I slept with my sketch book next my bed (or is that in my bed ??), so that in early hours of the morning (we had long summertime hours in the UK) This was in London in the first few days.

This photo was taken in Sydney, but gives you the idea of how I sketch at the table. Please note  I usually put my pen down when eating. My pencil wrap would be on my lap or on the table

OTHER OPPORTUNITIES

  • As a passenger in planes, trains and cars. This worked best when I knew how long the journey would take 
Sydney Airport


a quick sketch and slow drawing on the long plane journey

  •  In queues. There are plenty of those and some of them very long
 
on the Tube  no time to sketch! the trains come so regularly

at the check in desk at Barcelona airport. the line moved so fast !!

 
  • While waiting  for people. When a travelling companions are texting, emailing, resting, shopping. I usually asked for 1/2 hour “meet back here”.  I then had a known timeframe. My travelling companion knew that this was a sketching holiday for me and was prepared to these moments.


and I sketched everywhere 


Albert Memorial


The Tower of London
 
 
Trafalgar Square

Barcelona


A closeup of how I hold my sketchbooks and pencils. My sketchbook is balanced ontop of the pencilwrap, so that I can easily lift it up to gain access to the pencils. I also hold a selection of colours I am using in my sketching hand. It sounds awkward but it works for me


outside of St Paul’s Cathedral

outside of St Paul’s Cathedral
 
I would love to hear others experiences when travelling and any hints and tips. What do you do ?


If you are in Sydney. I am talking about my travel sketchbooks at Erin Hill Sketching  sketchclass on Oct 26 . Book in and I will see you there !


sketchbook travel journal : the reality

On Thursday, October 11, 2012 I wrote my thoughts on creating a travel sketchbook for KateJohnson’s wonderful Artist’s Journal Workshop blog. (If you are not familiar with it and the book you should read it !)

I reposted my original post on my blog in August this year.

I had written that blogpost to gather my thoughts “on paper” on how I would approach my own travel sketchbook. I had entered the 2013 Sketchbook Project and chose the theme : Travelogue. At the time I decided to revisit my 2007 holiday to Paris, as if I was there, drawing as much then as I do now ! My sketchbook is based on my diaries, photographs I took and where I thought I would have drawn at the time, as well as souvenirs I bought. Although this is created in retrospect, all the time I thought how would approach future travel sketchbooks.

The journal can be viewed here
Travelogue Paris 2007. Over the 18 double pages of the Sketchbook Project I experimented with composition, lettering, maps and came to some  conclusions about what and how I wanted to try and capture in my travel sketchbook journal.

In July this year I had three weeks holiday travelling to London and Barcelona, where I had the opportunity to put all of my thoughts and ideas in practice. I filled two Moleskine watercolour sketchbooks. This post is to review what worked (most things) and what didn’t (a few things) in reality. I knew what I wanted to try and achieve and what was important to me on my holiday in my journal.
 
I am so incredibly proud of my holiday sketchbook journals  (see them on flickr: London and Barcelona) and each time I look at them (for example, to write this,) I relive my holiday and it gives me immense joy to see the pages. They are a unique holiday souvenir that will be with me for a long time.

Below are my original theories from the Sketchbook Project  and then the reality of how it worked when I was actually travelling, with examples

· it will be a combination of on the quick on the spot sketching and more detailed drawings

This worked so well – and gave life and an individual feel to my sketchbook.


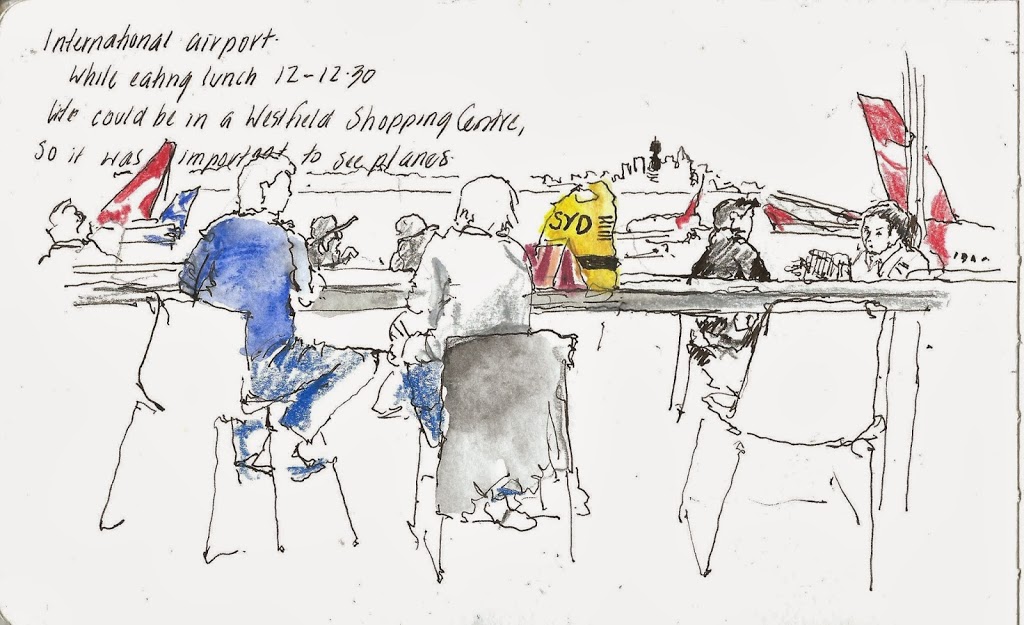
on the plane Sydney to Hong Kong. a very quick sketch of people queuing for the toilets after a meal. A drawing of my dessert (a delicious ice cream bar) . I drew the ice cream for a while then as it began to melt, I ate it, making sure I opened the packet in an inconspicuous section. I then kept it after the attendant cleared the meals away and finished drawing it then
 

I use watercolour pencils and Lamy Safari Joy ink pen. I can combine these and have a few different styles of drawing that suit different opportunities, the time and place or my mood. The above sketch shows the two extremes.


· leave first page or two of each day blank – at end of day I could draw maps, streets walked that day, rail/metro routes caught.

I wish I remembered to do that each day . I often forgot to leave the first page blank and would not remember until I had started the first sketch . I would then leave the rest of the page free. Next time I will turn to the next blank page the night before and write in pencil on the page LEAVE BLANK. Two pages could easily be left for this

· draw objects such as tickets, souvenirs, food, headings also at the end of the day in my hotel room. There is time and space to draw. If there is a good view from the room, I can draw it everyday


view inside the hotel room and also looking out the window. This was drawn over two or three sessions, just a bit at a time


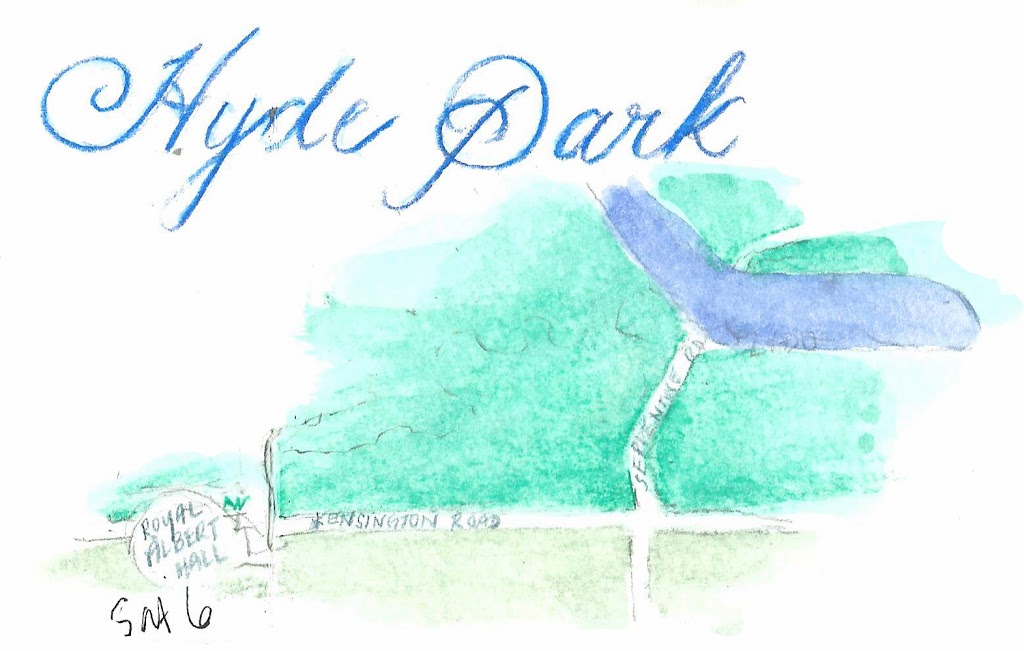
the leaf and seed were picked up in Hyde Park on this day. I sketched Royal Albert Hall on the spot and then left the space and drew a rough outline of the size and placement of the leaf and drew if at the hotel over the next day or two before it wilted


I stood across the street to sketch the printshop and then drew the books on the plane on the way home.


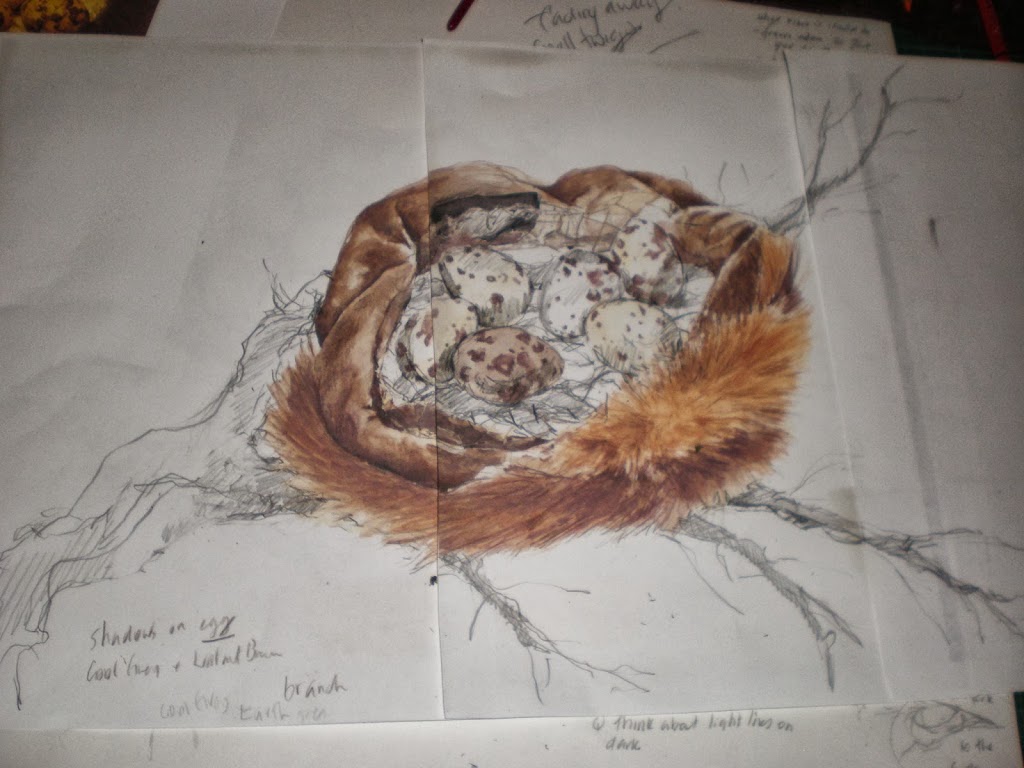
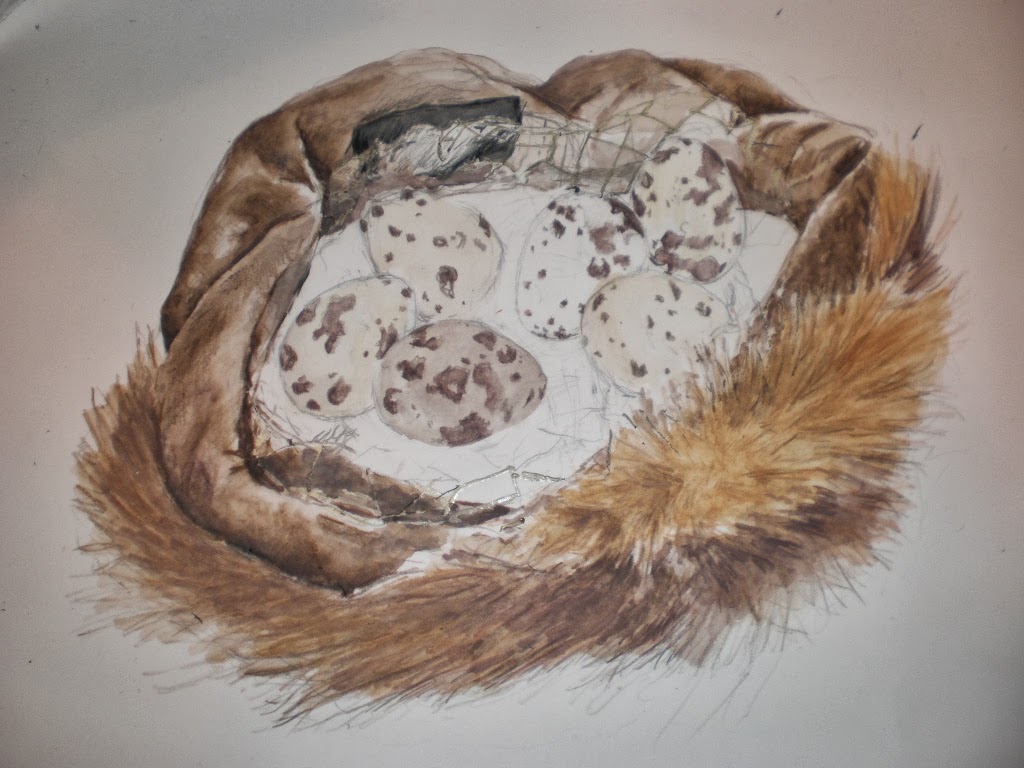
I had the feathers for a week and then realized that we were flying home the next day and could not take them back to Australia. Three feathers in one night !
   

I drew objects A LOT less than I thought I would, especially since that is a style of drawing I do a lot at home and get a lot of enjoyment out of. In reality, if I was working (that is the wrong word !) on my sketchbook in the evening, it was adding my notes, finishing off sketches by adding a bit more colour or line.

I was travelling with my mother and she was very patient with my sketching, and also appreciated quiet time for herself, while I sketched.


I was also very tired at the end of each day. It is part of being a tourist, walking and seeing a lot. We had 28 degrees in London each day and long summertime hours
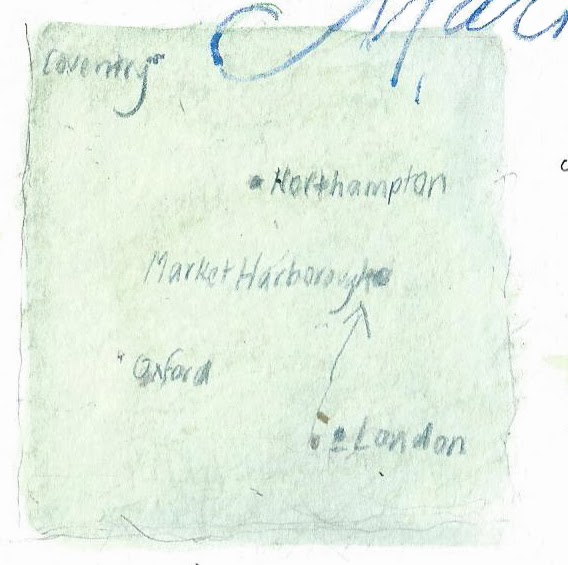


· MAPS.
If I colour the roads or areas between the road on a map I can match them with other colours I have used on the page, bringing it all together. 


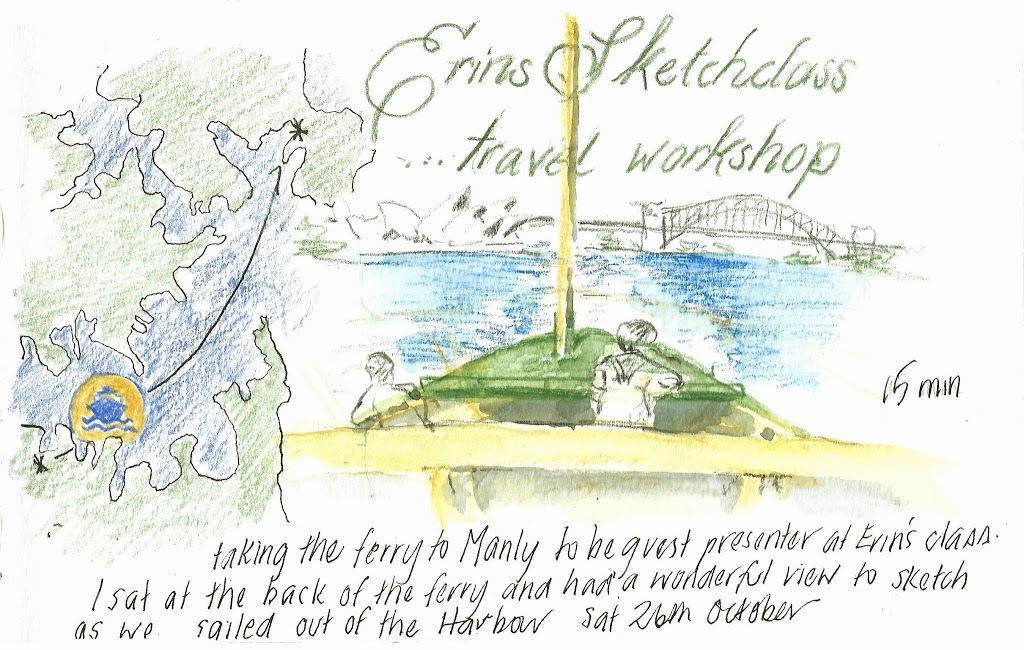
the blue and green of the land and river on the map, matching the sky
 
 
The lettering on the page matching the blue of the Serpentine


just the basics


I am really happy with this combination
 

I have never been comfortable with maps I tried to add – too many streets, too messy  looking. But I do want to include maps of my travels. I experimented with a few different alternatives in my Paris Sketchbook project. In the end I have a basic mud map. I have included  the streets we walked down and different types of transport. I did not do a map for everyday – probably only eight in the whole book, but I was pleased with those that I did. They are a gentle reminder of how we get where we went

·  leave lots of white space – I can always fill it in later if it looks too sparse.

as mentioned  , I did not do enough of this .

·   write commentary about how I feel, think, react to things, smells, places but not too much. I will probably keep a separate diary.
 

I want to write too much and have to make decisions about what to include. Often the sketch tells the story and only a few other notes were added.

I feel as though I did not write enough on the moment of thoughts and feelings. It was not often the right time and place. Often I scribbled some thoughts in pencil on the page and left a block of space around it to expand on it later (in the evening at the hotel).

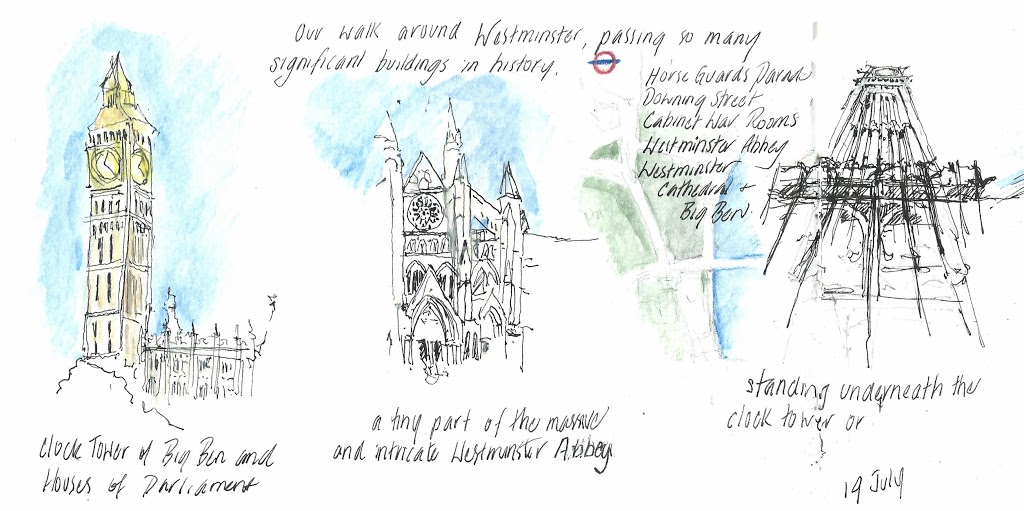
I still want to include something of the history or description of the place I am. But where to stop? In the end, my sketchbook journal is for me, not a history lesson, so I just need reminders of it’s place and importance in history. And there is SO much history in London. I was overwhelmed by it.


· buildings and vistas

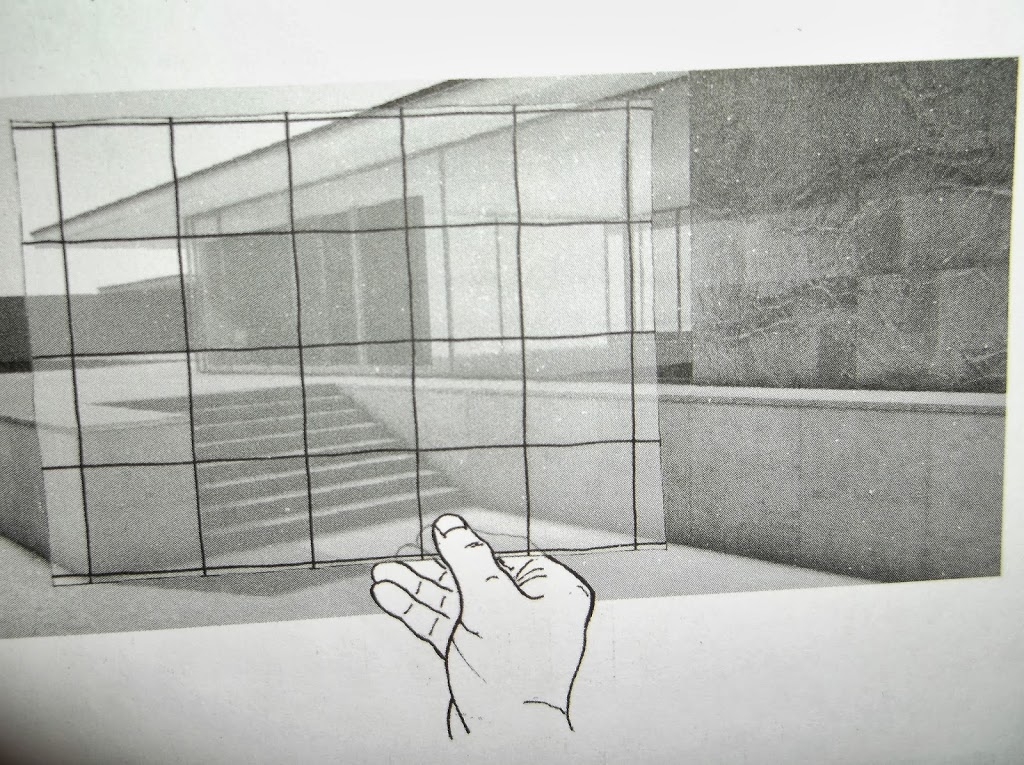
I know how I draw at the moment. I am at ease drawing objects, food, paper. I am not so good at buildings and vistas. But architecture is an important feature of a city or town and so I want to include it , the trees, roads, sky. I have been considering how it is best for me to capture a scene with these in it. I want to create a little vignette., with a little character and insight, but not too much

-just try an draw a section

-leave the top, bottom or sides unfinished.- lines drifting off

– only colour some parts  

· don’t try and fill the page – only use part of the page


I filled the page in the vast majority of the time -so much to draw !!!


don’t try and get caught up in the detail and try and leave this to a ” close up ” drawing later if I get the chance


Writing this has helped me think about what I have learned about my sketching and myself when travelling. I know that sketching brings me do much pleasure. I hardly took any photographs and when I did they were of people (and then there are those 20 photos of squirrels for reference photos for drawing at a later date).

My art is growing and slowing evolving as I meet other sketchers, go to workshops. These travel sketchbooks seem to be the culmination of a series of events . It is an exciting journey in itself.

If you are in Sydney. I am talking about my travel sketchbooks at Erin Hill Sketching  sketchclass on Oct 26 . Book in and I will see you there !


USK Barcelona DAY 3 Florian & Arno

I have written about my other Barcelona Urban Sketching workshops  .
 
 
All of my Barcelona sketches are on flickr 

 
This was the final workshop of the Urban Sketching Symposium on the Saturday morning. It was Barcelona Perspectives: Percepting and drawing Architecture (Workshop J)
 
Location: Caixafòrum

“You always have to express what is there to see – but above all you always have to (and that’s far more difficult) see what is there to see.” (Le Corbusier, famous architect, in a speech to students, 1962)
Starting from this quotation, we want to teach the participants to see correctly, which – in the end – means to draw correctly. The workshop is about drawing architecture correctly. It is a beginner’s or advanced workshop.

Sample Exercises

We are using a frame that represents the sheet of the paper. We make sure about our position towards the building we’re going to draw with preparatory drawings. Walking through the city, we’re mostly in a perspective relation to its buildings. A grid tells us about spatial shortening through perspective. With the grid, we’re able to transfer the correct proportions. The pencil can be used to find the horizon, which is important to establish the vanishing points onto the paper. The frame and the grid (and far more other drawing supports) will be attached to a script we hand out to every participant.

Learning goals

  • Learn how to see correctly through tutorials about perception, image plane and common perspective drawing.
  • To develop a feeling for space and proportions.
  • Knowledge about the dependence between viewpoint, angle and composition.
  • Perspective skills with 1 and 2 vanishing points.
  • Get to know architecture through drawing
 
 
We all caught the Metro to the Caixafòrum and had a short walk the amazing Mies van de Rohe building. It was originally designed and built as the temporary German Pavilion for the Barcelona exposition (often called the Barcelona Pavilion) in 1929. There is now a 1986 reconstruction  built on the original site.
 
I knew nothing about the building, although I had heard of the architect.  It is an important building in the history of modern architecture, known for its simple form and its spectacular use of extravagant materials, such as marble, red onyx and travertine.
 
I have included a photograph to give you an idea of its beauty and simplicity. You can read much more about this building at its website http://www.miesbcn.com/en/outside.html


The clear plastic sheet with grid marks
 attached to our workshop notes

 
           a page from the workshop notes, showing how to use the grid
 
The Workshop began with an explanation of use of the grid and measuring from vanishing points. The first position that we sketched from had two vanishing points. Our page was to include the entire building from end to end. This is so very different from my usual approach to drawing buildings. I usually do not draw the entire building and also having disappearing edges that fade away.
 
This workshop was the most challenging for me. The other workshops had pushed my boundaries and opened my eyes to new ways of thinking and sketching. But here, I was way out of my comfort zone. I found it very “mathematical” , and my brain and body freeze when maths becomes involved in anything in life! So I really had to try very hard and often remind myself to relax and not stress.


This was made so much easier, as one of the other participants was Sue Pownall, who had been a flickr & facebook friend for a while. We finally got to meet and could talk and laugh our way through this workshop. Here is a link to her review of the day http://www.suepownallartist.co.uk/1/category/uskbcn2013d5d50d5e97/1.html
 
I made a note in my sketchbook that it took me 25 mins to get the first 4 lines down on the page. “
 
          Panic – horizon ? agghh were was the horizon? are we just below it , yes? no?
 
It then to 10 minutes to get the next two lines
 
Over an hour later I had 24 lines/marks in the page. Half of these were wrong as Sue & I had changed our comparative measuring system halfway through. Florian and & Arno were VERY patient instructors
 
Sue Pownall & I showing off our completed sketches at the end of the Workshop

 
The second sketch was a lot easier as it only had one vanishing point. I almost felt like I knew what I was doing !

Sue watching Florian as he gave a demonstration of the sketch

Florian explaining concepts


USK Barcelona DAY 2 Richard Alomar

I have written about my other Barcelona Urban Sketching workshops  .

http://www.alissaduke.com/2013/09/usk-barcelona-day-2-barry-jackson.html Barry Jackson
 http://www.alissaduke.com/2013/09/urban-sketching-symposium-day-one-pm.html Marc Taro Holmes
http://www.alissaduke.com/2013/08/urban-sketching-symposium-day-one-am.html Luis Ruiz
 and I have one more workshop to write up –

All of my Barcelona sketches are on flickr

This one is Sketching Urban Place: People, Space and Street (Workshop G)  with Richard Alomar – It was very entertaining and very educational too !

Instructor: Richard Alomar (New York, USA)
Location: Plaça Reial

Workshop description

Urban spaces are designed by architects, landscape architects and engineers and, for the most part, used and experienced by non-designers. These manmade spaces have been conceived as “Places”. More than walls, streets and trees, they are outdoor rooms for people to move, talk, see and experience: They are the “Place” where life happens.

Sketches and sketchbooks can be used as a way to record these “Places”, beyond the traditional perspective cityscape or ornamental object drawing. Regardless of skill level (something that may take a while to develop) a sketcher can begin to experience “Place” and compose richer, more personally meaningful drawings by understanding the role of spatial structure, personal recollection and observation in the sketching process.

The workshop is structured around 3 activities:

  • Connect: Walk around the space. Understand the patterns, forms and urban elements, including people, void space and structures. 
  • Collect: Record your impressions of the space informally through words, mental mapping, thumbnail sketching, sequence sketching or other “reportage” formats.
  • Compose: Soak it all in. Talk it over with another sketcher. Start to sketch the space as a “Place”: A record of your experience of it. (This can be done in groups of 2 or 3 if needed).
  • Learning goals

    Student will:

  • Learn the spatial components of urban space.
  • Learn various sketching techniques to record initial impressions of “Place”.
  • Understand how to frame and compose a sketch to reflect their individual impressions.
  • Share with others their impressions and techniques.
  • Strengthen the importance of individual expression in sketching

 PART ONE
“quick!  quick! quick ! ” (it was a fast paced workshop)
“1 pencil , 1 sketch book – what‘s that in your hand ?–a second pencil – put it away!” 

We walked along the street  and told to stop, draw a Thumbnail square in sketchbook . then have 30 seconds to draw the streetscene  we are looking down
wow !  But after a few of these, my mind started to get into thinking  and seeing in that mode. So instead of spending the first precious 15 of the 30 seconds in a “mind freeze” when we stopped, I could look up and see the street scenes as major shapes and lines and shadows. I started to learn to see what is important. We also added notes around the thumbnail sketch – street names, feelings, colours of buildings etc
We repeated this with two minute sketches 
We then looked at the difference between two  sketches how much difference between the 30 sec and the two minute sketch? how much more or less was capture the second time ?  


By the end of our walk we had captured some spaces and views of our journey in a series of quick sketches. Amazing

PART TWO

Things got interesting as we turned into La Rambla, a  tree-lined pedestrian mall stretching for 1.2 kilometers . It is crowded, busy and tourist packed
I promptly got separated from the rest of the group, with one of the other participants (and also instructor) Fred Lynch. We did have a map of the proposed route of the day,  and we walked up and down through the crowds and after 20 mins decided to write off the rest  of the  workshop and head back to the start. At the moment we looked up and there they were !!!

The group were working on a session on interpreting La Rambla in words and sketches 

This was easy as we just been discussing our thoughts of La Rambla ( they were not good thoughts )
 
 
PART THREE
The last part of the day . In the square – an urban space 


My takeaways – (these may not necessarily have been Richard’s aims of the day!)
 

  • The amount of information that you can capture in a sketch on a page in two minutes –

  • There is always something to draw (I am a great believer in this )

  • Thumbnails- love this idea but always forget to do it, I should prepare a page